Recently all three female guppies had birthed leading to a busy tank. I took time out to build a side set-up for the fry but this left me with a dirty tank and annoyed me how hard it was to clean including the filter. So I decided to make myself an overhead water filter by utilising an old compartment box which has the benefit of 6 compartments to play with.
This container started life as heat shrink pipe container with various diameter sizes inside, overtime I used it for storing RC parts inside. Its 18CM long, 10CM wide and 4CM deep which 6 compartments making it ideal for multiple types of filter medium.
The water will flow out the left of the tank via this adjustable flow valve. Passing the water down through the top of the fish tank into the shower bar below.
For the water to flow through each compartment I used a 10MM drill bit for three holes in each divider and later I added several more 6MM holes to increase the flow rate as it wasn't quite high enough.
In the top you can see a hole on each side both 6MM diameter. The right hole opposite the valve is where the water from the pump will feed in. The hole on the right is to feed in CO2 from a yeast mix in bottles. It goes in at the last stage to best dissolve the CO2 into the water and not filter it out in the prior stages.
Time for filter medium!
The first compartment is kept empty on purpose, I want to see the water level to check in flow rate easily at a glance. The 2nd compartment is blue medium filter sponge which removes any bigger pieces of dirt.
Compartment 3 is carbon pellets full to the top, this further filters the water removing particles that got through stage 2. Stage 4 containers fine filter sponge that scrubs the water of particulates left and stops the carbon escaping through the drill holes.
Stage 5 is reserved for bio-pellets when I'm able to get some. Finally stage 6 is empty (I removed the blue sponge) and you can now see the air stone which defuses the CO2 input into smaller bubbles. This gives the CO2 a greater surface area to mix with the water and least wasteful.
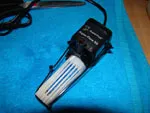
To pump the water too the new overhead filter I used the original water pump and removed the small filter that was on it and placed a basic filter to stop chunks being sucked through the pump and damaging the blades. As you can see I just used tie-wraps to hold it in place.
Due to all the changes in the tank and additional fry things got pretty messy. So I've re-arranged the tank by removing some plants and lots of the white gravel. It makes cleaning lots easier.
However there is still a plantation at the back for fry to hide in when the females birth again. Now when you look in the tank you don't see the water pump at all. On top you can see the filter box with the various water levels due to each medium type giving different resistance to the water flow. Below the shower part is uncapped so there is no flow resistance at all.
Additional benefits included my green neons once again swimming in a school group and more active shrimp.
I'll make another tank/s update in a few weeks when the fry are bigger and you can see the colours.
 Nano fishtank - custom overhead 6 compartment water filter
 Nano fishtank - custom overhead 6 compartment water filter


